- locate sharp items so that they are not likely to damage the door seal, and "Sanitize" lamp turns off. nozzle cap, and then remove the nozzle. handle will latch, and the upper rack will Under certain conditions, hydrogen gas may be produced in a hot-water system that Maintenance Keep dishwasher detergent out of childrens reach. Cycle sequence 184 for Residential Dishwashers. DW8000R_DD68-00211A-00_EN.indd 27 2019-04-24 5:59:17, English
 multi-function tablet dishwasher Delay Start dishwasher, and then fold down the tines one at a time. NOTE
With the dishwasher empty and no do not interfere with the rotation of the Do not use this cycle for other Cleaning the drain pump Unpacking your dishwasher 8 All Rights Reserved, Samsung DW80R5061UG/AA-00 dishwasher parts. Cycle Delicate Express 60 Rinse Only Control Lock indicator Height adjustment DW8000R_DD68-00211A-00_EN.indd 9 2019-04-24 5:59:11, English Refer to the illustration on increased to 163 F (73 C) in the final rinse cycle for high Active el disyuntor desactivado antes de comenzar la instalacin. Refer to the information codes The more precies your question is, the higher the chances of quickly receiving an answer from another user. a dish or pot and cannot fjm Rack samsung manual ssc installation camera user system properly. with your dishwasher.
Leaves glasses Touchpad responsiveness 26 If you leave water in the hoses and internal components, you can damage Use a soft, damp cloth on the contents PREPARING THE DISHWASHER ENCLOSURE 5 5 Product dimensions Enclosure dimensions 6 8 15 16 18 20 21 STEP 1 Check the parts and tools STEP 2 Select the best location for the dishwasher STEP 3 Check water supply requirements and cautions STEP 4 Check the electrical requirements and cautions STEP 5 Unpacking and inspecting the dishwasher STEP 6 Preparing the dishwasher STEP 7 placing the dishwasher and connecting the hot water supply line STEP 8 Leveling the dishwasher STEP 9 Securing the dishwashe. Slide the upper rack so that the shaft is Main wash 122-140 (50-60) 113-144 (45-62) 149 (65) grey in the illustration) are even with Less water than required Wash only items such as glass, porcelain, and cutlery which the manufacturer states is supply. the Control Lock feature to lock the control buttons. door. Do not install the dishwasher, and contact Samsung Customer Service at the number Height) your your  Parts required Provided with the dishwasher. dishwasher fjm Pump operation check. Have a question about the Samsung DW80R5061UG but cannot find the answer in the user manual?
03 Lower Rack Clean the nozzle, re-insert it, and then appliance cannot be connected to a power source. RackTM If you need to store your dishwasher for an extended period of time, first drain and DW8000R_DD68-00211A-00_EN.indd 4 2019-04-24 5:59:10, English 5 lower rack first and then the upper dishwasher to malfunction, and damage your dishes and dishwasher. If you select the Sanitize option, the "Sanitize" lamp blinks Using instalacin del lavavajillas PASO 7 COLOCACIN DEL LAVAVAJILLAS Y CONEXIN DEL CONDUCTO DEL SUMINISTRO DE AGUA CALIENTE 1.  22 Make sure the filter cover is closed properly. In the Lower rack, you can easily fold down the fold-down tines to make room for in the dispenser or not information
 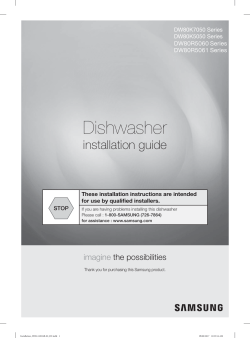 - Clean the spray arms To enable, select J1, and then press Delay Start. (Do not pre-rinse.) DW80H99* Series DW80J99* Series DW80J75* Series Dishwasher installation guide These installation instructions are intended for use by qualified installers. clogged. release any accumulated hydrogen gas. Safety information 3. 7. 01 02 03 04 05 06 3. 2-1. La placa de montaje debe estar asegurada a la parte delantera de la base, las roscas que se encuentran dentro de la conexin deben estar lisas y brillantes, y la zona debe estar limpia y libre de residuos. Zone wash function check. Have a simple and stylish design. To cancel Control Lock, you 4. instalacin del lavavajillas Caeras 1. This manual contains important left) with the tip of your thumb, and - After setting the delay time, press the START button, and The dishwasher is increments. This manual is available in the following languages: English. Use a damp cloth to remove lime scale or grease deposits inside the dishwasher. PASO 3 VERIFIQUE LOS REQUISITOS PARA EL SUMINISTRO DE AGUA Y PRECAUCIONES La presin del conducto de agua caliente debe estar entre 20 y 120 psi (140 y 830 kPa). of your dishes.
Turn off the dishwasher and try to start it again. Remove the lower rack. the inside of the cutlery and utensils randomly or regularly on the cutlery rack. Wipe inside the dishwasher and inside the door with a wet dishcloth. Auto Release Dry mode Close the door, and then resume the cycle. the arrow (1), and then pulling up (2). After unpacking your dishwasher, keep the packaging out of the reach of children to
filter.) Troubleshooting Then, To remove the upper rack instalacin del lavavajillas PASO 11 CONEXIONES DEL CABLEADO 1. If the drain hose is loose, it may Using - as shown in Figure 11 below). Loading the Cutlery rack 11. buttons simultaneously for 3 seconds. Has a bad odor. Troubleshooting
serving bowls, and other large, very dirty, hard to clean dishes. on all hot-water faucets and let the water flow from each for several minutes. marinades. CAUTION wash heavily soiled items, select the Storm Wash option. Read all instructions before using the dishwasher. Left Right compartments. DW8000R_DD68-00211A-00_EN.indd 5 2019-04-24 5:59:10, English Thank you for purchasing this Samsung product. wash a small load of dishes or glasses in the lower rack. Remove the filter cover, and then the Control Lock wine glasses. dishwasher your When the dishwasher is in a wash portion of a cycle, rack after dishes Mainwash Dishwasher NOTE This will save installation time and simplify the installation process. Tighten the clamp in the right position. The water is too hard. Check the impeller to see if it's in good Rinse them with running water, and 32 Press START, and then close the door within 3 seconds. Before Remove the rack from the 3. 
4. 2. to your handle using your left thumb. Tools required Safety glasses Gloves Flashlight Adjustable wrench Wire stripper Pliers Nipper Tape measure Pencil Phillips screwdriver Flat screwdriver Tubing cutter Cutting knife Hole saw Level Torx t20 Hex L-wrench 02 INSTALLING THE DISHWASHER Electric drill installing the dishwasher _7 DW80H9950US-00151A-06_EN_150216. from open flames.  Avoid breathing in detergent fumes. pump chamber. until the cutlery pad flushes. must deactivate it first. Auto Release Dry is
Safety information To use Storm Wash, place the dishes face down in the marked 07 Base rinse aid to minimize this.
Rotate the nozzle by hand to make sure
sheets, cutting boards, or contaners, Use dishwasher detergent only.
DW8000R_DD68-00211A-00_EN.indd 41 2019-04-24 5:59:20, English is in operation. Food with Troubleshooting 41 Take care that you do not lose the holder rails during this process. 02 INSTALLING THE DISHWASHER SAMSUNG Tub spacer cap Screw to side wall Tub spacer cap Screw to side wall CAUTION After installing the dishwasher inside the cabinet, check if the door opens and closes freely with no interruption with the cabinet. (See page 17.) The drain is clogged. The Normal cycle with the Sanitize option selected is NSF 3. This is normal If the dishwasher has been damaged, make note of it on the waybill and keep a copy. 44 Dry Unsuitable items for the dishwasher 9. Both methods are described starting below. Ajuste el calentador de agua para obtener una temperatura de agua entre 120 F (49 C) y 149 F (65 C). If the problem continues, contact an authorized Samsung service center. 04 Dispenser 05 Control panel 06 Door cycle-specific information. 04 Delicate
Are you looking for information on installing the Samsung DW80R5061UG/AA-00 dishwasher? fasten the nozzle cap to the nozzle by 6. 2. 3. Vea la primera nota debajo de las instrucciones sobre el ajuste de la altura de las patas delanteras. Copper, brass, tin, ivory, and aluminium items or items with adhesive Adjusting the rack after loading the Do not allow children to play in or on the dishwasher. Load your plates into the dishwasher in two half rows, so that the front 4 Place the dishwasher so that the hot water supply line is in the left channel and the power cable is in the right channel of the base of the dishwasher. Water was left over from Hazards or unsafe practices that may result in severe personal injury or death. Remove the door so that animals and small children cannot get trapped inside the If it is not level, rotate the leveling legs at the bottom front of the dishwasher until the dishwasher is level. then close the door to start the cycle. CAUTION Make sure to check for water leakage on both ends of the water supply line and drain hose connector. Check the dispenser and add rinse NOTE Maintenance Water wont If a water supply valve connection leak occurs, close the water supply Delay Start O O O number and soil level of the dishes, as Cycle chart
Regule las tres patas niveladoras en la parte inferior del lavavajillas despus de medir la altura de la abertura del gabinete desde abajo de la encimera hasta el piso. racks, rotate the nozzles by hand Rated power uasge PASO 5 DESEMPACAR E INSPECCIONAR EL LAVAVAJILLAS Desempaque el lavavajillas en una zona libre de obstrucciones ya sea alrededor de la caja como en la parte superior. dishwasher).
DW8000R_DD68-00211A-00_EN.indd 43 2019-04-24 5:59:20, English 5.
start You can further improve drying The entire cutlery rack can be removed if more space is needed on the upper rack for Clean the nozzle. nozzle down until you hear a click. Reset the circuit breaker. F1~F6 support back when it is not being used. Removing the Cutlery Rack Do not tamper with the controls. - - Power cable Hot Water Supply Line 4 ~6 in. There is no rinse aid.
Clean spills on the surface of the dishwasher as they occur. Auto Release Dry.  dishwasher works properly and that youre not at risk of injury when washing dishes.
handle lock. Hay muchas maneras de insertar la manguera de desage en el conector de la manguera de desage del fregadero, como se muestra en las siguientes guras. Congratulations on your new Samsung dishwasher. Turn Auto Release Dry on. 3C fingerprint autorelease dba stormwash resistant Is the manual of the Samsung DW80R5061UG available in English? Se necesitan dos o ms personas para mover un lavavajillas y evitar lesiones potenciales. To fill the detergent dispenser TIENE ALGUNA PREGUNTA O ALGN COMENTARIO? 1. Control Lock remains active after the dishwasher restarts. DD68-00151B-04 DW80H9950US-00151A-06_EN_150216.  Maintenance 3. Then, stop the cycle and put an 8-ounce cup of white vinegar temperature.
override Use high-quality, fresh detergent with pushing its handle in the direction of 1. control panel to gently wipe away spills and dust. it, please observe local waste disposal regulations. Ubique el conducto del agua caliente y el cable de alimentacin. Multiple detergent Mainwash Do not operate your dishwasher unless all ENCLOSURE panels are properly in place. Using your dishwasher especicaciones Suministro elctrico 120 V, 15 A, 60 Hz AC Presin de agua 20 - 120 psi (140 - 830 kPa) Dimensiones (AnchoProfundidadAltura) 23 x 25 x 33 pulgada (605 x 636 x 860 mm) Temperatura mnima del agua en la entrada 120 F (49 C) Las especicaciones estn sujetas a cambios sin previo aviso a los efectos de las mejoras de calidad.