Try a half or a third of a stop, if it is too dark or too light. Put a piece of tape on each of the seams where the cardboard squares meet. The lamps should face directly into the holes of the light tent. Having download this photo editing software you can change background, make clipping path, color correction BUT it ill be more difficult and longer than in Photoshop BUT for free. White fleece and nylon are also excellent choices. Repeat this for 2 more of the squares.
Put the light box in a naturally well-lit area, like near a bright window. See my disclosure for more information. Copyright 2022 Fixthephoto.com | All Rights Reserved. Crystal Bear.
It isnt challenging to buy low-cost office lamps and use them for making a lightbox. Next, cut out three sides of the box, leaving about a 1-inch border on each side. The best idea is to use one light source per each window of the DIY lightbox. You shouldn't need to do any other photo editing, but a simple crop can save you a lot of careful repositioning.  Want the same photo editing like on the example above? If you need to avoid this, just scale back this action.
The black backdrop requires -1. hu@Ys%cz,QU'FA44U>nN@+s$+P3j5H4\ 07r^t[ -e#}u`* 6ltxTpZBy$g Glossy poster board can reflect the light and cause glare. With this photo light box, you won't have to depend on natural sunlight anymore and start taking high-quality pictures to sell online. The material of the box mustnt be getting too hot. You dont have to worry about making this perfectas you can see, mine is free-handed and a bit messy. If they are of a slightly yellow or blue-ish colour, adjust your white balance in your camera settings to achieve the accurate colour that is true to life, For more tips on Product photography and lighting: In order to fasten the fabric to the sides of the lightbox for photography, you will need a tape.
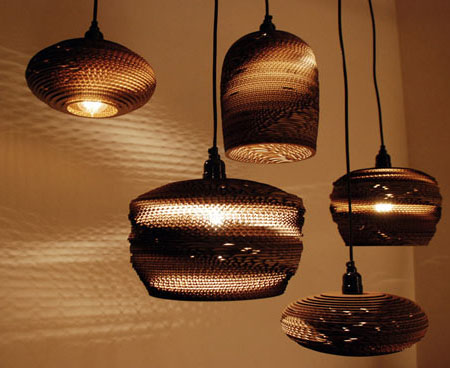
Do this on all four sides, and cut out the smaller square that youve created in the middle with an X-Acto knife. Wide aperture like f/1.8 and selective blur are recommended for food photographs.  It will make an object look like it is photographed in a deserted area. Thank you for your sharing and service in this. You have to keep moving the slider before you see that the background is clipped evenly but the subject is left intact. You should pay attention to the color temperature of the light sources and use this information to find the ideal white balance. cardboard traffic boxes light cool diy You may also like this reading list tailored just for you, Share your photos on My Canon Story & stand a chance to be featured on our social media platforms, Brought to you by Canon Singapore Pte Ltd. When you need the subject of a shot to be lighted from above, you may draw a window on the upper part of a lightbox for photography. 7_Yk^GqSig,k:dn=tli4F]S>NbeAUfk;:byC7IY_Kqe1sdOSM:~}4 This adjustment can be also made manually. In this way, the pictures taken in DIY light box wont look yellow. Very detailed with pictures. Send your product photos to FixThePhoto and get professional product photo editing services for $2 per photo. box christmas light 3d shadow paper cut diy card Choose product photos you need to edit and remove all imperfections caused by poor light and distracting shadows. wikiHow is where trusted research and expert knowledge come together. Proudly created with. Start by cutting out 5 squares of cardboard that are the same size. cardboard lamps lights recycled corrugated furniture scrap light sustainable box boxes pendant lighting houston materials graypants lamp crafted hand innovative light box paper papercut cut lightbox diy shadow boxes deepti The same must be done on the opposite side. Boxes made of wood or opaque plastic are a good fit. box light diy macro strobist studio cardboard boxes another tips estudio fotografico mini como casero hacer para softbox caseiro homemade Are special light bulbs needed? Sure, there are reviews, testimonials, and product descriptions.
 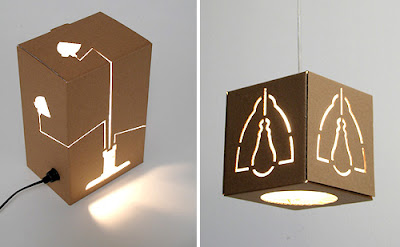 Make sure to use matte and not glossy poster board. diy tracing lightbox ikea light box led manmadediy hack table cheap lights acrylic lighting into craft Place the object that you want to shoot in the middle point of the white area and take a shot!
Therefore, you could not only get the best photo light box but the one that looks neat. You can often rent these quite cheaply. Ensure that there are no folds or stains on the white paper. Use a seamless backdrop for a neutral background. Learn how to make DIY light box for product photography instead of buying an expensive photo light box on Amazon.
Then, tape the flaps at the top down so they're not in your way. It doesn't have to be necessarily white, other colors are suitable as well. This free Photoshop texture creates a luxe effect for your product photographs. In case you wish to learn how to make a lightbox for photography that will serve you for a long period of time, use durable materials. Locate the box on one of the sides for the flaps to be open in front of you. |-)&4RG+W98oXBy%FpPEY uj\Yg&G;[dz7 AI-'p\4CEJsW:0FiWZ The next step is to put a large piece of packing or duct tape to the upper edge of the poster board. Customers also like seeing a product in its natural environment. Its always possible to reduce the resolution of an image after the fact. In order to make your own light boxes and give them an eternal look, you won't find anything better than a white poster board. In order to fit precisely into the box, get rid of the board's unnecessary edges using the cutter or scissors. Your email address will not be published. box light easy diy crafting better radmegan paper wax cardboard cut How to Create a Sparkly Background with Bokeh Circles for Pretty Trinket Pictures The paper used for the panels is all A4 size. When you use the box, these shadows disappear! Search for such a board at the nearby craft shop, it doesn't cost much. When it comes to resolution for product photos, we recommend shooting at the highest quality you can. A photo lightbox (also known as a white box or light tent) is an empty box with translucent white sides and a smooth, white backdrop. If your photos are too dark or too bright, try adjusting the exposure by changing the ISO, shutter speed, or aperture. By adding some diffusing panels to a cardboard box and wielding some cheap lamps properly, you can make a lightbox that'll give you great shots within an afternoon. This device gives an opportunity to take longer shutter speeds and have sharp photographs as a result. (Im using scotch tape in the mini example, duct tape or packing tape works best), **Leave a small gap between each square so the light box can be folded up and back down again.**. Measure 2 inches from the edge of one of the cardboard squares.
A shallow depth of field puts the focus on the close-up details of your product, while the background fades out. You can experiment with lighting patterns by putting the light sources away or closer to the windows. Here are more ideas for taking your own product pictures and getting the right set up. from a window), or use photo lamps in combination with a soft box. She holds a BS in Interior Design and Consumer Science from San Francisco State University. Locate the white poster board or a thick sheet of white paper on the upper part of the DIY light box. The board must be nearly twice as large as the upper side and equal in width with the box. This will be the size of the window that you will cover with a piece of fabric, parchment paper, or tissue. My favorite project from the video was this Foldable Photo Studio. My favorite project from the video was this. k'N$o5qa#GJ#e,#D"l?Hls@hPWIfL\2I|LSbNH As an alternative, you may use old white undershirts. If you'd like a more "compact" version with the lights built in, they sell them in various sizes on Amazon: You could try getting some LED lights and sticking them inside your light box on the top panel for a similar effect. light papercut boxes crafts arts box sold
Best viewed in IE10+, Chrome, Firefox, Safari, professional table top fluorescent lighting, How to Create a Sparkly Background with Bokeh Circles for Pretty Trinket Pictures. *Some of the links below are affiliate links, meaning I may earn a small commission if you purchase something through my link. If you have a big window, for example, position your product so that the daylight falls on it from one side. *Some of the links below are affiliate links, meaning I may earn a small commission if you purchase something through my link. Trial Run Here you can adjust masks and layers like in Photoshop but slower. Make your lifestyle product photography bright and pop. Instead, pay attention to Daylight fluorescent light bulbs which cost no more than $7 apiece. Coming from a design background, Crystal brings a sense of style and artistry to her work that brings out her clients inner confidence, showcases their beauty both inside and out, and puts them at ease. Once you've done that, trim a piece of white posterboard to be the same width as the box and then tape it to the top inside edge of the light box.