19. I heard some methods leech out bad stuff if exposed to temperature changes or humidity.  I was curious if anyone knew anything about the glues leaching into the water and making your lettuce or whatever full of methyl ethyl ketones or some other chemical pollutants. Screw each half into the bulkhead fittings while further tightening the collar on the bulkhead fittings as shown below. vinyl fence post hydroponic vertical garden - Google Search. Oh well. Ideally the top of the grow wool cube will be just below the lip of the cup. Hose down the tubes to remove all PVC fragments. Want to be able to disassemble for inspection and cleaning. Now that you've got that under your belt, it's all downhill from here. I left out a few holes on what will be the unused fourth side of the tower, since there will be no plants on that side. Part 4: Lighting Next insert some small raindrip adapters into the 1/2" tubing. Add hot glue around the edges. placement of the outlet hole is very important as it will determine the And if theres one thing I love, its unnecessary technical complexity. 15. Fill it up with water and make sure the air and water pumps are doing what they do.
You can wipe away any excess glue at this point. Once the glue cures, I fill in the gaps with silicone to stop any leaks. Each item on the supplies list is linked to websites where you can buy everything you need online, but you can also find these items in local hardware stores or other websites if that suits you. garden hydroponics tower planters towers vases greenhouses concrete houses vertical Here is a link that might be useful: My Blog - Hydro Progress. I place a 2 net cup in one of the holders, and as long as the bottom of the cup extends at least a little into the tower, its going to work just fine. Once Ive got the towers mounted and positioned, I can run the pump hoses and finish up the drain line. The parts list for our video course is located here. Instead use 100% silicon sealant or silicon caulking. Are vinyl fence posts safe for hydroponics 2home hydroponics 10 tips click here for full article with photos. Growing your own food is a wonderful feeling. Part 7: Harvesting. You will need to drill holes in the fence. We use cookies to improve the content and performance of this Website.
The center union does not require glue, it can be screwed together to create a watertight seal. The tomatoes above were one of many harvests from just a few plants. It also will allow the rails to be separated later on for cleaning or transport. water level inside of the PVC tube. To seal out the light further, and keep the foam in place, I fill around the edges with spray foam. 17. Mark each plant site hole location with a permanent marker. If you are interested in that, please check out r/microgrowery. Part 6: Planting I'm wondering if anyone can comment about how their hydrocork is holding up? I love the looks and feel of the product but my installer said it's not forgiving at all. Check your inbox or spam folder to confirm your subscription. Then enjoy the fruits of your labor. Ideally you will Finally seal the 1/2" tubing with an endcap. The pump doesn't have to be very powerful ( I used a 264 Gallon per hour pump). ( i thought my flooding days were over). Save my name, email, and website in this browser for the next time I comment.
Obviously, Im not the first to dream up growing small plants in a tower configuration, and there are easily-purchasable options out there.
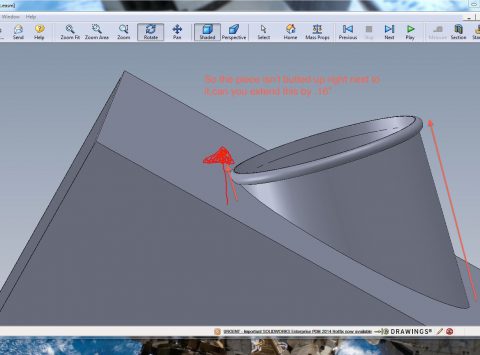
Then add the cap (should be a compression/tight fit).
Thank you in advance for any feedback. The build below should be doable for under $100. . Opensea as an nft marketplace diy nft hydroponics with fence posts. I still can't decide on flooring. While this will work, it is far from ideal for a variety of reasons. The large threaded section of the fitting should go inside the rail. At this point, the function becomes clear, and I can judge my cup holder size guesstimates. 14.
This will prevent the collar from loosening later on. with a marker. Drill out the holes. Pvc (poly vinyl chloride) is a thermoplastic polymer they make from various chemicals, which can comprise of phthalates, lead, and cadmium. Note about links: We have linked to certain products that we have found useful when building our hydroponic systems. Part 2: The Support Structure Husband wants wall to wall carpet and I'm for a virgin PVC luxury vinyl planks for all the reasons it is so popular. However, it is always outside tucked away in some corner that is difficult to find. Once in you can nail them into place. I drill holes inside these ovals to make room for a jigsaw blade. Could you take a picture of the full setup? No more vinyl for us. You can simply build them out of Add some pre-washed expanded clay pellets to the bottom of the cup ( clay dust can clog up your system). Find the leaks (there are always one or two) and add more sealant. But I have never seen vinyl cheaper than PVC. I used expensive liquid fertilizer at first, but now after a few years of trial and error, have switched to an inexpensive powdered fertilizer. Then fill in the cup with more expanded clay pellets. Ive done this myself, and it works just fine. I thought about that. If possible put them all at the same height so that they have equal water flows. I want to make something similar in my kitchen). Cover Align the elbows correctly so that they point approximately 45 degrees downward toward the end of the rail. Drill a hole in the end cap about Using a hole saw on PVC is tricky the best way Ive found is to run the bit forward until its through the PVC, then run the drill in reverse to put the hole saw through. Apply a small amount of super glue to the exterior threads of the fitting just before tightening the collar. I glue a 1/2 ball valve on the end of the pipe with some PVC cement to keep everything in until I want to drain it away. The first attempt was using the vinyl fence post cover (the square box pvc), my new one will be using standard 4 inch pvc round pipe. At this point it is a good idea to clean things up a bit. I use submersible garden pumps that will live in the reservoir full time, so I cut a relief in the top edge of the tote to make room for the wires. The idea here is that I can connect a pump to the T-fitting with 1/2 hose (run up through the tower), pump hydroponic nutrient fluid to the top of the tower, and itll rain down the inside on all the plants roots. You will be amazed how big your plants get compared to the same plants planted in soil. I looked for it and couldnt find it so I was leaving and walked out in between the hardware and garden shop and it was under the roof but not inside, if that makes sense, in a blind aisle. I've had trouble locating a source. This takes a bit longer, but its much less prone to snag the PVC and smack you with it, and also leaves a much neater hole. hydroponic homemade indoor hydroponics system systems gardening pvc guide hydro pump growing cheap garden stones gardens build organic contained self The first thing to do is get some seeds to grow. Then press together, twist one quarter-turn, and hold for 15 seconds until the glue takes hold. Use what you want, but keep in mind that liquid fertilizer with lots of particulate matter will clog up your system with sludge. 4. 3. Assemble the connection fitting by screwing together the two halves of the PVC union. We are embarking on major remodel / new construction of our home and plan to install wood clad casement windows. At the other end of the tower, I need a way to get what the plants dont drink back to the reservoir. Using a 1.5" hole saw with the drill set to reverse, center the drill directly on the mark you just made, and carefully drill out each hole. hydroponics I cannot see over this 6 ft behemoth (Im 5) & it cuts off airflow. PVC was the easiest and cheapest work with so I had to make that compromise. The glue fuses the two pieces of pvc together. pvc hydroponics pipe hydroponic plans projects diy planter philippines garden chairs pipes visit planes outdoor container 9. This piece of the system is where your plants will dwell, and what you'll be looking at the most! This is the same glue used on water pipes. You can always cut off some length, but you can't add more so be careful. You'll want a minimum of 2" to allow for gluing to the fittings. The Insert the bulkhead fitting into the appropriate hole on the side of each rail (the holes drilled in Step 3). hydroponic nft hydroponics system systems growing technique film nutrient pvc diy indoor plans gardening homemade types jasons organic guide build hard to find plants called Baker Creek Heirloom Seeds. Looking good, I used fence post as well, works really well and so customizable. Vinyl fence posts are a good bit cheaper than PVC versions, so they are attractive from a cost point of view, but not if PVC is safer. Both Lowes and Home Depot have it. Thankfully, I am just this type of idiot. Read our privacy policy for more info. Unfortunately, this red lid is basically translucent, and therefore, useless. Just simple 6000K LED T5 lights instead of something more specialized. So I fill it with styrofoam. Ugh. The holes on the left side will have a 1" bulkhead fitting and 1/2" bulkhead fitting with elbows to be used for inflow and outflow. To purchase, visit: www.cstolle.towergarden.com, Our 3D printed/vinyl fence post aeroponic tower is doing great!!! Note: Inflow and outflow tubing is explained more in depth in the Reservoir article so you don't need to take care of that now. Vinyl fence cement provides a good strong hold, but its been my experience that it doesnt provide a perfect seal, and the cup holders may leak out the precious hydroponic goodness. A glued-together approach works better for me. The BEST tip for quickly and safely cleaning vinyl fences (and plastic furniture), no elbow grease required! Each weighs over 100 lbs, so Ill attach the towers to them and they wont blow over in the wind (take that, nature!). This creates two perfect retaining rings to hold the pipe in the end cap, one on each side. Gain privacy and separate areas with one of the most economical fencing choices: stained, painted or untreated wood, Learn about how this utilitarian outdoor feature can be a beautiful addition to your home and yard, Have pets, kids and a tight budget? Part 3: The Reservoir . ), Other Articles in this Series: Add a seedling or two to each grow wool cube or alternatively start your seeds in the cubes for a few days until they sprout. Heat up you soldering iron in a well ventilated place. - DJ. Is growing plants in pvc safe for hydroponics? . Please refrain from posting marijuana grows. fence fencing wire cedar ranch mesh farm rural fences diy field shaven un horizontal Cover with white duct tape. I have porcelain tile in all the bathrooms and kitchen. Fence post end caps image. By the way, where are you getting the fence post? Yeah, I think so too That's a great idea! Using pvc vinyl fence cement (or epoxy), glue standoffs into the oval holes on one. little bit with my pliers. hydroponics The main concern I have with aquarium sealer (silicone) is that it doesnt seem to stick to many things very well. strawberry vertical planters hanging gutter fencing jardin jardinera cabane landscaping hydroponic hortus verticales homeguides sfgate strawberries huertos jardineras potting higher quality product, gives you some physical and mental exercise and A miter saw works great but we have also used a circular saw or a hand saw. Looks great! 13. Take a cheap soldering iron and 24 party cups. Next screw in a small screw to secure the end cap. A garage is usually a good option. had some buried in the ground for over 15 years and not only is it still useable it didn't even discolor!! 6. With this set up you can still access your plugs and you won't getelectrocutedeither which is quite the deal. YOu could probably use some hooks over the railing to hold it up rather than take up space with a stand. Even if youre not fully providing for all your meals, and only getting an occasional snack out of the garden, its amazing to watch something grow, care for it, and literally taste the fruits (and vegetables) of your labors. bigger so that it doesn't clog when the roots start growing. Rotate the PVC to the next side with no drilled holes (drilled holes facing each other, sandwiched in the center). We want the outlet to be Now plug all three air lines in to the adapter and attach that to an air pump. Who knew it was this easy?! You also need to make a hole on the side for the plug to the submersible pump.
:max_bytes(150000):strip_icc()/HorizontalFence-aec8e943f95c4e76a0987b73a09ea47d.jpg)
Where the holes are, and how big, is a matter mostly dictated by where youre putting the system, and how you want it to work. You may need to widen the hole a bit after cutting it, the idea is that 2 PVC pipe will fit through snugly. I will search around some for the evaporation thing, maybe read a few labels. You can buy some I glue the cup holders on over each of the holes using vinyl fence cement. 2. (use white baskets preferably) note: Now that ive got a tower, i need some way to get the hydroponic fluid in, on to the plants, and back out again.
Size matters here, and Im cutting each one to be maybe 1/4 deep on the smallest edge while still leaving the entire round profile on the flat side. 11. start this 3-5 days before you begin building. Hard lessons. As my house is all torn down to the subfloor and we are on hold until I get some answers from Wicanders! pvc plans pipe fence hydroponics projects Next I cut 1/2 off each end of a 2 PVC coupler. This system is reliable and sturdy. Now all that is left is to make some holes in the tub for the outlet hoses so that the water can recirculate back to you plants. Cut the 4" Square Fence Post in half, creating two 50" sections. The connection fitting has a 1" NPT x Socket PVC Adapter Schedule 40 on each end, the 1" PVC piping you cut in Step 2, and a 1" Socket PVC Union in the center. For a complete parts lists including costs and where to buy everything you see below click HERE. There are additional features that allow you to sell your artwork without any issues. Besides, its more fun if you build it yourself. We use cookies on our websites for a number of purposes, including analytics and performance, functionality and advertising. A pair of towers ready to grow tasty strawberries! Vinyl fence post sleeves have UV resistors in it, PVC doesn't. #broccoli #aeroponics #hydroponics #wonderpeppers #verticalgarden #austintx #zucchini by seednleaf. .after all this discussion I'm still confused as to which brand of window to select! Make sure the tube is short enough to fit inside of your container when the lid is closed. I'm more worried about the PVC cement I used to glue the end caps onto the post. This time Im shooting for something a little more robust. You will need to drill this in reverse on your drill or it will catch. Vinyl plastic products expose children and all of us to harmful chemical additives such as phthalates, lead, cadmium and organotins all substances of very high concern. Drill a hole for the small raindrip tube with your drill in both the lid of the tub and into the end of the PVC fence post. Then I cut out the drain hole. Post grow journals, questions, and discussions!
Ive got that same type of lettuce and I let it get way bigger. I made this strawberry planter from left over parts from vinyl fencingworks great! Find your safety glasses for this project, as sawing and drilling the PVC fence post can throw around small chunks of plastic. I would want area rugs to warm up the look however; now I have high maintenance. The general idea here is that Ill cut a bunch of these cup holders, which will hold 2 net cups with the plants in them. Fence post end caps image. pvc agriculture hydroponic lettuce greenhouse vegetable pipe seed larger Looks good.
You want these tubes to be long enough to reach to the end of the PVC fence posts. *Important: While we aren't against growing marijuana, this subreddit is for those who want to grow plants that are universally legal. But it's currently winter here right now plus the system is indoors. The two equal-sized holes on the right side will 1" bulkhead fittings with the connection piping between them. I think I could get a lot of plants out of a small space with these square post sleeves, and I think its what the other manufacturers appear to use, if no they are really close. Here is a link that might be useful: My Blog - Click here. Once it is fully dry, do a water test by filling up the PVC tubes with water. I would not hesitate to use it.