
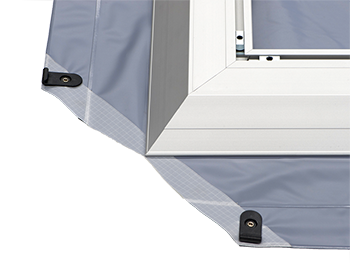
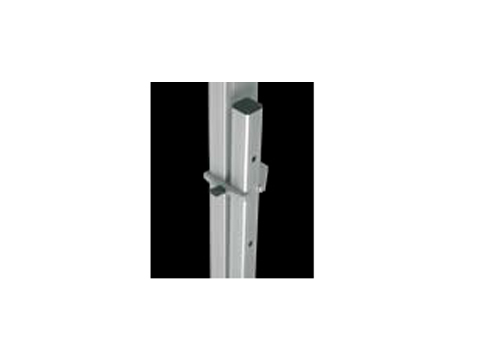
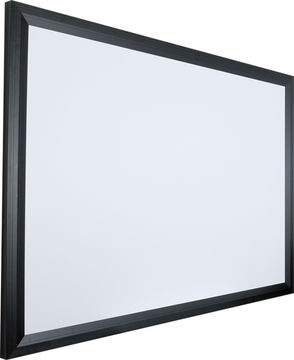
The perfect profile connection for very large projection screens ensures optimum form stability and minimum deflection.
 If you do not wish to use cookies, you can change your browser settings so that you will be informed about possible cookie usage. Copyright 2022 AV Stumpfl GmbH, All rights reserved.
 Privacy Policy.
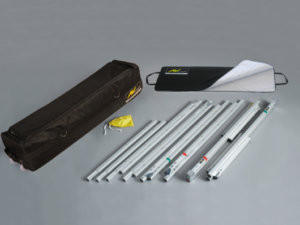
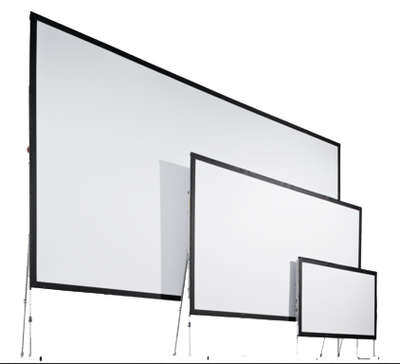
We will email your quote within one business day or less. 2 Now the surface can be pulled off the frame easily. vario stumpfl av brochure Weve spent the last decade finding high-tech ways to imbue your favorite things with vibrant prints. stumpfl bcc r10 varioclip projector vario stumpfl av 1m 10kused Engaging the shear joints ensures the maximum screen stability. In case of two supplementary frame components 6 and (6) per frame side, the standard elements 5 (110cm) have to be placed in between of the two supplementary frame components 6 and (6). Put the screen upright. thomann They do not cause any damage. 4 Finally stretch all the remaining QUICKCLIPTM over the profile edge. This catalog includes most of our rental products in a line card format. If you disable this cookie, we will not be able to save your preferences. downloads varioclip manual 2-3 Press on the projection surface by starting at one corner and fasten the buttons one by one. 1 First open the vertical elements of the legs (with holes) 2-3 The snap joints engage automatically. shift t32 projection mobile adjusting easier never screen height been 4-5 Unfold the vertical frame elements. technicalforum.avstumpfl.com/viewtopic.php, Includes: Wings RX, Wings RX Creator, Wings Avio Manager, Wings Touch, Wings Avio Service. Copyright 2022 AV Stumpfl GmbH, All rights reserved. Additional cookies you can choose to accept are being used for Google Analytics. The cookies used for Google Fonts, embedded Vimeo and YouTube videos as well as Google Maps are essential for our website. Please enable Strictly Necessary Cookies first so that we can save your preferences! No tool is required. 4 To secure the legs by a single person, we recommend the use of set up supports. Slide on with the upper round steel fork two set up supports each on the legs and center supports. 2-3 Hook the first QUICKCLIPTM into the slot of the corner plug and additionally a second QUICKCLIPTM along the vertical and horizontal profile groove. You can find out more about which cookies we are using or switch them off in settings. Do not engage the shear joints now and lay out the components according to their labeling.
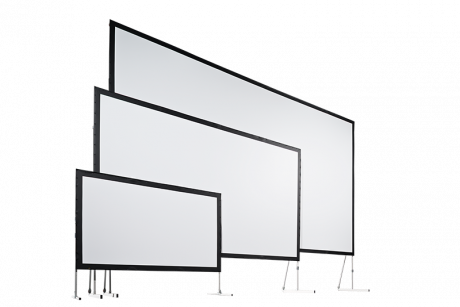
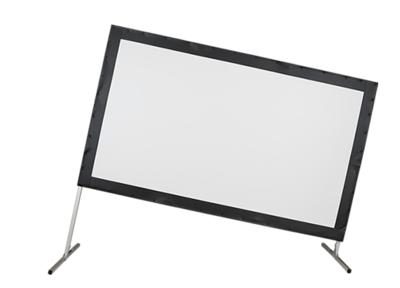
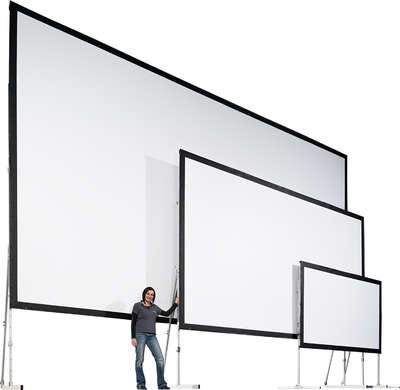
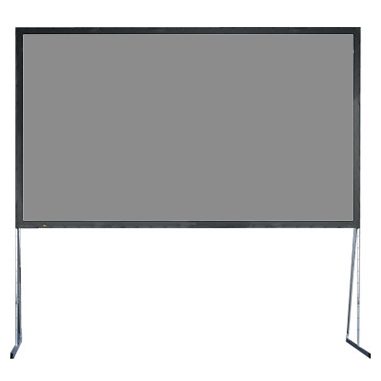
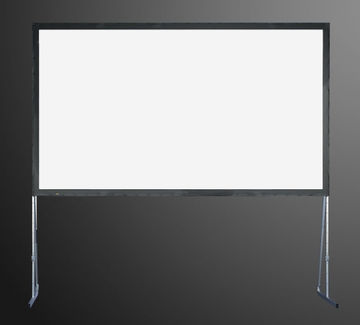
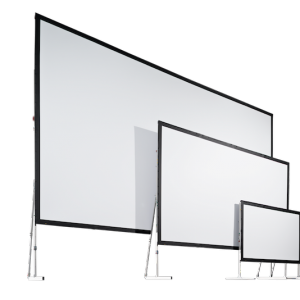
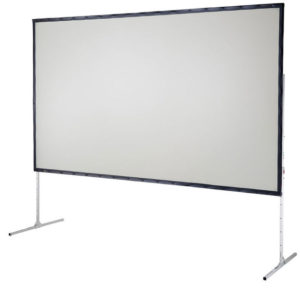
Setting up a Varioclip projection screen is as simple as it sounds even for low utilization users. stumpfl av bds aw400 screen decoframe projector projection 1995 - 2022 Rentex, Inc. All Rights Reserved. Slide on with the upper round steel fork two set up supports each on the legs and center supports. Depending on the application and screen size two different connection types are available for VARIO. 1 Lay out the surface on the frame with the label OBEN-TOP corresponding with the upper frame bar. stumpfl screen bxs av projector r10 projection ac345 bms ac286 screens folding rear ivojo 4 To secure the legs by a single person, we recommend the use of set up supports. If you would like a price list or a rental quote, please email info@rentex.com. The standard elements 5 (110cm) and supplementary frame components 6 (below 110cm) have to be inserted according to their labeling (see sketch above). These cookies include but are not limited to services such as Google reCaptcha and TrustedSite. 4 Open the front leg bars and lock the corner hinges. To reach local support, simply click on the location below. 4 Bolt the telescopic support with the wing screw M8x50mm (yellow).
A cookie is a small text file that get put on your computer through your browser. vario
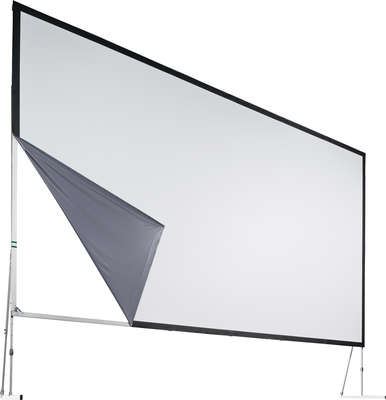
All components of the mobile projection screen are labeled. surface stumpfl av projection screens We are dedicated team of designers and printmakers. 1 To detach the projection surface you have to remove the QUICKCLIPTM on one vertical and one horizontal frame side only. Should you decide to deactivate cookie usage, our website's functionality may be limited. stumpfl av fold fast ft screen 4wall rentals Update Packs can be found below. We have over a decade of experience creating beautiful pieces of custom-made keepsakes and our state of the art facility is able to take on any challenge. 5 The feet are secured with two wing screws on the lower vertical frame element and the clamp connectors are attached at the topof the feet. 4 Bolt the telescopic support with the wing screw M8x50mm (yellow). Open the shear joints and telescopic leg supports with one person next to each of the foldable legs. screens stumpfl truss
In case of two supplementary frame components 6 and (6) per frame side, the standard elements 5 (110cm) have to be placed in between of the two supplementary frame components 6 and (6). Too often, great ideas and memories are left in the digital realm, only to be forgotten. A simple 90 rotation and the connection is secured.
stumpfl vario projector legs For Rental Emergency Support, call (866) 541-3465, 1995 - 2022 Rentex, Inc. All Rights Reserved. Keeping this cookie enabled helps us to improve our website. Please enter the product (s), quantity, and additional notes to receive your quote, AV Presentation & Office Equipment Rentals, Video Presenters & Document Cameras Rentals. stumpfl moble (Please follow the separate instructions for set up support). If you need detailed specifications for our rental equipment, please view the product page or email info@rentex.com.
Bring down the screen by supporting the screen along the legs and vertical frame elements towards the top corner edges. downloads shift manual t32 Setting up a Vario projection screen is as simple as it sounds even for low utilization users. To avoid mechanical overload and damage of the screen elements and legs with large screens or high set-up height, the screen has to be raised with an appropriate number of persons or rather by using hoisting devices. doorzicht stumpfl projectiescherm productsheet All components of the mobile projection screen are labeled.For assembly, start with the basic frame. kh bvz s64 fixing stumpfl Lay on the legs on the bottom bow and align the hole pattern matching the connection points at the desiredset-up height. Lay on the legs on the bottom bow and align the hole pattern matching the connection points at the desiredset-up height. You can then decide on a case by case basis, whether to allow cookies. The QUICKCLIPTM snap into place automatically. 5 Finally retighten the telescopic support clamp. stumpfl av screen r10 bcl projector bcv lock projection screens ivojo folding Rentex will never share your information. Copyright 2022 AV Stumpfl GmbH, All rights reserved. If you need it sooner, please call us at. curve stumpfl av 1 Folded MONOLYTE frame 2-3 Unfold the frame along the horizontal frame bars, so that the legs are directed towards the audience and the snap studs are facing upwards. Apple Desktop M9590LL - Power Mac - G5 Dual, ALLGEMEINES - GENERAL Zubehr - Accessories ALLGEMEINES DRAPE KIT, MONOBLOX INSTRUCTION FOR MOBILE PROJECTION SCREENS, ALLGEMEINES - GENERAL Zubehr - Accessories ALLGEMEINES, Technical Equipment FPCC - Ferry Porsche Congress Center. This catalog includes most of our rental products in a line card format. They enable us to recognise your browser during your next visit. screens stumpfl standard This website uses cookies so that we can provide you with the best user experience possible.
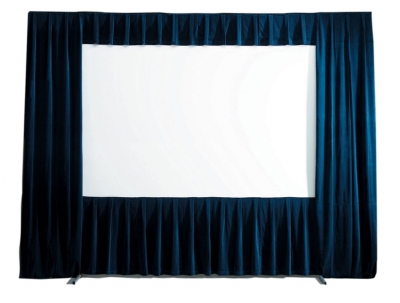
This website uses additional cookies to help us improve our users experience. Setting up a Monolyte projection screen is as simple as it sounds even for low utilization users. 6-7 The snap joints will engage automatically. stumpfl decoframe If delivering, please include city, state, and zip code below: Please Note: No legs or dress kits available. Weve done the legwork and spent countless hours on finding innovative ways of creating high-quality prints on just about anything. With locations across the country, Rentex can deliver to most major cities. Press on the projection surface by starting at one corner and fasten the buttons one by one.
Please mind the instructions for projection surfaces in chapter OPERATION, MAINTENANCE and SERVICE in Monolyte manual. stumpfl av bwv screen projector projection stumpfl To avoid mechanical overload and damage of the screen elements and legs with large screens or high set-up height, the screen has to be raised with an appropriate number of persons or rather by using hoisting devices. sc230 r5 strato 5 The feet are secured with two wing screws on the lower vertical frame element and the clamp connectors are attached at the topof the feet. There are no Specs available at the moment. 1 Lift the projection screen with one person at each of the top corners and put it up by supporting the screen along the vertical frame elements. Depending on the application and screen size three different connection types are available for VARIOCLIP. stumpfl bwv screen projector
The standard elements 5 (110cm) and supplementary frame components 6 (below 110cm) have to be inserted according to their labeling (see sketch above). Manualzz provides technical documentation library and question & answer platform.Its a community-based project which helps to repair anything. The quick and easy plug-in connection for small to medium sizes when installed with legs. Engaging the shear joints ensures the maximum screen stability. stumpfl screen kit av projector projection folding rear Please note that this website uses cookies. Put the screen upright, unfold the rear leg bars and lock the hinges. An update Pack can be found in the downloads as well. Lay out the surface on the frame with the label OBEN-TOP corresponding with the upper frame bar. 1 Lift the projection screen with one person at each of the top corners and put it up by supporting the screen along the vertical frame elements. plsn Cookie information is stored in your browser and performs functions such as recognising you when you return to our website and helping our team to understand which sections of the website you find most interesting and useful. 5 Unpack the skirt and attach it at the double studs on the bottom of the projection surface and along the lateral sides of the legs. We are using cookies to give you the best experience on our website. SHIFT-leg adaption - Instruction for Vario Screens, INLINE 125 motor quickmount (fabric unwinds front), INLINE 125 crank quickmount (fabric unwinds front), Inline 125 T Quickmount (fabric unwinds front), MAGNUM 210 spec sheet (fabric unwinds front), MAGNUM 300 spec sheet (fabric unwinds front), Wings_Engine_Live_Input_Update_Pack_V6.09.zip, Sentinel System Driver Installer 7.5.1.exe, Wings Platinum 3 "Platinum.exe" Windows 7/8/10, Wings Engine Graphic Driver Update Pack V375.63.zip, FHD_Player_specification_media_production.pdf. stumpfl monoblox stumpfl moble Entpacken Sie Datei und kopieren Sie die beinhaltete "Platinum.exe" in den Ordner: C:\Programme\AV Stumpfl\Wings Platinum 3 und ersetzen Sie die Alte. Some cookies will be stored on your browsing device, until you delete them. 5 Finally retighten the telescopic support clamp. (Please follow the separate instructions for set up support). * Your assessment is very important for improving the workof artificial intelligence, which forms the content of this project. Repeat this step according to the numbering in picture 1. 10-14 Unfold the legs and secure them with the corner hinges. This means that every time you visit this website you will need to enable or disable cookies again. Please enter your information to complete your quote request. The quick and easy plug-in connection for small to medium sizes when installed with legs. The plug-in connection with additional locking for larger screens and/or flying- screen mounting. This website uses Google Analytics to collect anonymous information such as the number of visitors to the site, and the most popular pages.
1 Lay out the surface on the frame with the label OBEN-TOP corresponding with the upper frame bar. Strictly Necessary Cookie should be enabled at all times so that we can save your preferences for cookie settings. The frame sections are joined together free of play by the clamp bar with the included Torx screwdriver. We are using cookies in order to make using our website and its contents more user friendly. 8-9 Lock the corner hinges to gain maximum stability. Please Note: No legs or dress kits available, AV Stumpfl Projection Screen Options from Rentex, 31,000 Lumens 3-Chip DLP Laser Projector with Auto Screen Adjustment Kit, 21,000 Lumen, 4K UHD, 3-Chip DLP Laser Projector. Wings RX V2.2 requires some updates on your Wings Engine. That means: We can print whatever you need on a massive variety of mediums. Do not engage the shear joints now and lay out the components according to their labeling. This version of Wings RX requires new drivers for the live video inputs installed in your Wings Engine. Unfold the corner elements 1 to 4. 1 First open the vertical elements of the legs (with holes) 2-3 The snap joints engage automatically.
Hier finden Sie eine Liste des zum Verkauf stehenden Equipments zum Herunterladen . Copyright 2022 AV Stumpfl GmbH, All rights reserved. screens lite stumpfl da standard